Install Slackware to Acer Aspire One
AA101
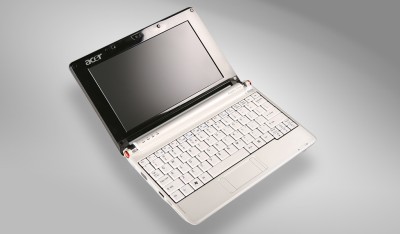
Impression
It’s a toy.
The spec of Acer Asipre One is nothing to write home about. I’ve got the 512MB 8GB SSD Linux version, white color. It’s said there are two versions of SSD (Intel v.s. Samsung) used in the parts, and the Samsung one is a lot faster. Sadly I’ve got the Intel version, and the 2200mAh battery (some people got 2400mAh). It doesn’t discourage me though, as anything would entertain a man migrating from a 500mhz PIII machine.
I’ve had much fun tweak the default Linux distro Linpus. The AA1 boots in about 17 seconds to its single user interface, which is kind of good but once after I take a look of the Linux internal setups, what a mess!
One can easily tell that it’s a rushed work with so many inconsistency in the custom scripts and various settings. I never understand why nobody takes Slackware onto these Atom based netbooks? It’ll be a much cleaner fit IMHO.
Install Slackware 12.1
I’ve finally decided to ditch Linpus and replace it with Slackware. But first of all I need to make sure everything must still work under Slackware, so I’m doing it on a USB thumb drive.
Do not attempt the following if you are not already a Slackware user! Otherwise you might risk damaging your AA1 installation. You have been warned!!
For this reason, I’ll skip the details about Slackware itself, its usual installation procedure as well as packages dependencies for certain software.
Install Slackware to USB thumb drive
AA1 doesn’t have a cdrom drive, so everything must be done through USB and local disks. First, to start Slackware installation from a USB disk:
- Get the
usbboot.imgfrom theusb-and-pxe-installers/directory off a Slackware 12.1 distro mirror. - Insert a USB disk to AA1 (preferrably 1GB or bigger size), it’s usually identified as
/dev/sdb. - Install
usbboot.imgto it bycat usbboot.img > /dev/sdb.
Next download the base package set a from the Slackware mirror to somewhere on AA1’s local HD.
Then reboot AA1 and press F12 to choose boot from USB drive. It should now boot into the Slackware installation prompt. I choose to install Slackware over the same USB disk (thus overwriting the installation disk), so I did fdisk /dev/sda to prepare the drive with 1 partition, set it to be bootable.
Note that the default Slackware kernel has a different naming convention than the Linpus kernel for USB drives. The system HD in Linpus is known as /dev/sda and first USB disk as /dev/sdb, but in Slackware the HD is /dev/hdc and first USB disk is /dev/sda and so on. Keep in mind this difference as later we switch back to the Linpus kernel for Slackware.
After the drive is properly partitioned, run setup and it should show up in the setup menu when you choose installation target. Choose to format it as ext2, and choose source from a local HD partition /dev/hdc1, point the directory to the parent directory where you put the base set.
Now proceed with the installation and DO NOT install Lilo. We’ll use syslinux later to make the USB disk bootable later. When you are done, reboot AA1 into Linpus.
Make USB Slackware bootable
We’ll install the Linpus kernel to the USB and boot from there by doing the following:
mount /dev/sdb1 /mnt/usb
cp /boot/bzImage /mnt/usb/boot/
cp -r /lib/modules/2.6.23.9lw /mnt/usb/lib/modules/
We’ll use syslinux/extlinux to make the USB drive bootable.
yum install syslinux
cat > /mnt/usb/boot/extlinux.conf <<END
default Slackware
prompt 1
timeout 1200
label Slackware
  kernel bzImage
  append initrd=initrd.gz
END
extlinux -i /mnt/usb/boot                  # install syslinux to partition
cat /usr/lib/syslinux/mbr.bin > /dev/sdb   # make it bootable through MBR
We are going to boot the kernel with initrd because we’ll have to load the USB kernel modules before the root device is even mounted. To do this:
mkinitrd -c -k 2.6.23.9lw -m usb_storage:ehci-hcd -w 10 \
  -f ext2 -r /dev/sdb1
cp /boot/initrd.gz /mnt/usb/boot/
(If you don’t have mkinitrd installed, or encountered error in the above step, get the mkinitrd script from slackware 12.1, don’t forget to chmod 755 mkinitrd after you download it)
One last thing is to edit /mnt/usb/etc/fstab, make sure it’s /dev/sdb1 in the first line for the root filesystem. Restart the system and press F12 during boot, choose to boot from USB drive, and off we go!
Complete Installation
Now that it boots off USB drive into Slackware, and most kernel modules have been detected and loaded by hotplug. So we are almost there!
But since we only installed the base system, it needs more stuff to be functional. The first thing I did was to make the wireless network working, which can be skipped if you are using ethernet.
To do this, we’ll borrow the binaries installed on the Linpus partition.
mount /dev/sda1 /mnt/hd
export PATH=`PATH:/mnt/hd/bin:/mnt/hd/sbin:/mnt/hd/usr/bin:\
  /mnt/hd/usr/sbin:/mnt/hd/user/local/bin
export LD_LIBRARY_PATH=/mnt/hd/usr/lib:/mnt/hd/usr/acer/lib
cp /mnt/hd/usr/local/bin/wlanconfig /usr/local/bin
/usr/local/bin/wlanconfig ath0 create wlandev wifi0 wlanmode sta
iwconfig ath0 essid "your essid" key "your wep key"
dhclient ath0
After we are connected to Internet, we can finish the installation by downloading the rest slackware packages and installing them. I didn’t go the full route, but instead installed slapt-get and use it to manage Slackware packages. To make slapt-get working, you’ll need to install the following packages first (get them from just any Slackware FTP):
libgpg-error, gnupg, libidn, gpgme, curlConfigurations
With necessary packages installed (and logout and login as root again to restore the original PATH and LD_LIBRARY_PATH environment), we are ready to configure Slackware to work better with AA1’s hardware.
Because we are using the same stock kernel from Linpus, everything pretty much stil works.
Xorg
Just copy the xorg.conf from Linpus:
cp /mnt/hd/etc/X11/xorg.conf /etc/X11/X can now be started just like before.
Synaptic Touchpad
Slackware is missing the xf86-input-synaptics package, which can be obtained from the freedesktop’s git repository:
git-clone git://anongit.freedesktop.org/git/xorg/driver/xf86-input-synaptics/
cd xf86-input-synaptics
./autogen.sh
./configure --prefix=/usr
make
make install
This will install the synaptic_drv.o as well as a few utilities to the correct directory. Make sure you restart X and check /var/log/Xorg.0.log to see if it gets properly loaded. Very likely it’s not! This is because the kernel didn’t load psmouse module properly. To verify:
dmesg | grep PSIf you see PS/2 Synaptics TouchPad instead of SynPS/2 Synaptics TouchPad then it’s not configured properly. The fix is very simple:
rm /etc/modprobe.d/psmouseAfter a reboot, you should get SynPS/2 from dmsg and it should now load and work properly in X. An extra tip is to run syndaemon -dt to prevent accidental touches from messing up with the usual typing activity.
Wireless and LED
You can copy add_driver.sh and del_driver.sh from /mnt/hd/usr/bin to /usr/local/bin. These two scripts adds or removes the ath0 network interface through modprobe and command wlanconfig (sample use of wlanconfig was illustrated in sections above).
If you want to try and compile your own madwifi drivers, the one that’s known to work with AA1’s athereos card is http://snapshots.madwifi.org/madwifi-hal-0.10.5.6-current.tar.gz . This package no longer needs wlanconfig to create the device, just modprobe ath_pci module will do (by default the needed kernel module are already auto-loaded by the system). Also I experienced no more signal dropping problem after this upgrade.
To enable the LED (lower-right corner below the keyboard), do this:
cat > /etc/rc.d/rc.netdevice <<END
sysctl -w dev.wifi0.ledpin=3
sysctl -w dev.wifi0.softled=1
END
chmod +x /etc/rc.d/rc.netdevice
ACPI and powersaving
ACPI is always a pain in the neck to configure, and here is an issue still not resolved yet:
X can’t be killed and then restarted after a successful resume from suspend-to-ram.
It means X continues to work after resume, but if it happens to crash or you quit X, too bad you can’t restart it and only way out is to reboot.
I suspect Linpus also had this problem, but I no longer have it on my HD to verify. The hibenate script from TuxOnIce does the suspend-to-disk nicely, and doesn’t suffer from this problem.
I’m still trying other alternatives such as pm-utils.
Powersaving is not much a big deal for me. I don’t plan to use kpowersaved or other power management tools because they are too clumsy. Indeed I find the whole thing about HAL and DBus clumsy, but that’s another story.
To enable ondemand CPU freq control, I put the following in my /etc/rc.d/rc.local:
modprobe acpi-cpufreq
modprobe cpufreq_ondemand
modprobe cpufreq_stats
modprobe cpufreq_powersave
modprobe cpufreq_userspace
modprobe cpufreq_conservative
echo ondemand > /sys/devices/system/cpu/cpu0/cpufreq/scaling_governor
Hot Keys
Some hot keys are hardwired in the BIOS, such as the Num Lock, blanking (fn-F6) and brightness adjustment (fn-left or right arrow).
To enable hot keys, here is the part of my /etc/rc.d/rc.local
/usr/bin/setkeycodes e025 130
/usr/bin/setkeycodes e026 131
/usr/bin/setkeycodes e027 132
/usr/bin/setkeycodes e029 133
/usr/bin/setkeycodes e071 134
/usr/bin/setkeycodes e072 135
/usr/bin/setkeycodes e055 159
/usr/bin/setkeycodes e056 158
TO use hotkeys in X, just download, compile and install XHKeys, the same program used by Linpus. It already supports OSD message display, which, though not as nice as splashd, is enough for my purpose. Here is my ~/.XHKeys:
xhkeys.codeline10:	248;0;A#;display.sh rotate
xhkeys.codeline12:	191;0;A*;TouchPad Enabled;touchpad on
xhkeys.codeline13:	192;0;A*;TouchPad Disabled;touchpad off
xhkeys.codeline14:	78;0;A#;gotosleep
xhkeys.codeline16:	123;0;A*;Brightness Up;/usr/bin/true
xhkeys.codeline17:	239;0;A*;Brightness Down;/usr/bin/true
xhkeys.codeline18:	160;0;P;vol;Mute
xhkeys.codeline19:	176;0;P;vol;Volume +10
xhkeys.codeline20:	174;0;P;vol;Volume -10
xhkeys.codeline22:	115;0;A#;superhome
xhkeys.codeline7:	233;0;A*;Wireless Enabled;wireless on
xhkeys.codeline9:	234;0;A*;Wireless Disabled;wireless off
xhkeys.osd:	        yes
xhkeys.osdBkgrColour:	navy
xhkeys.osdColour:	turquoise
xhkeys.osdFont:	        7x13bold
xhkeys.osdFrameColour:	blue
xhkeys.osdFrameWidth:	2
xhkeys.osdGeometry:	+5+5
xhkeys.osdHAlignment:	centre
xhkeys.osdTimeout:	3000
xhkeys.plugin1:	        xhkeys_mixer;vol;devname=[/dev/mixer];devgrab=n;
XHKeys supports the volume control as a plugin. And display.sh, touchpad, gotosleep, superhome, wireless are just scripts to do respective actions. I only bothered to implement display.sh because the rest didn’t matter much to me.
SD/MMC
Put this line in /etc/rc.d/rc.local to enable SD/MMC devices:
modprobe pciehpI don’t seem to have the issue with SD card as reported by other AA1 users. It detects card insertion and mount is painless. But like most other external devices, they don’t survive suspend-to-ram, and must be disabled before and re-enabled after a suspend. (more on this later)
Soundcard and Camera
The soundcard and video module are automatically detected, but the built-in microphone is known to be not working, not even in the default Linpus installation.
I compiled and installed alsa-driver 1.0.18rc1 separately, but snd_hda_intel module now requires a parameter in order to work. To enable this:
echo "options snd-hda-intel model=toshiba" > /etc/modprobe.d/alsa-baseDifferent configurations like model=auto or model=acer might also work, but none of them gave me a working internal mic. With model=toshiba at least I can adjust the volume speaker and earphone separately, but an external mic is needed to record voice.
Migrate from USB drive back to main HD
The migration is farily straight forward, and I did it without formatting the HD because I want to keep my home directory. First you need to mount /dev/sda1 /mnt/hd if you haven’t done so, and remove all directories under /mnt/hd/ except home (and perhaps var if you previously had your emails in /var/spool/mail). To copy over the system from USB drive, we’ll use rsync.
mount /dev/sdb1 /mnt/tmp
rsync -aHAX /mnt/tmp /mnt/hd
cat > /mnt/usb/boot/extlinux.conf <<END
default Slackware
prompt 1
timeout 1200
label Slackware
  kernel bzImage
  append root=/dev/sda1
END
extlinux -i /mnt/tmp/boot                  # install syslinux to partition
cat /usr/lib/syslinux/mbr.bin > /dev/sda   # make it bootable through MBR
Notice that we didn’t transfer files directly from / and instead did a double mount of /dev/sdb1. This is because we want to avoid copying files only meant for runtime. Also we are not using initrd here because the HD will always be detected first by the kernel, so additional module loading or rootdelay is no longer necessary.
Make sure you edit the first line /mnt/hd/etc/fstab to be /dev/sda1 before reboot. You might want to add the swap partition /dev/sda2 to it as well.
If you have followed the steps thus far, you should have a complete Slackware system working on AA1 by now. Though the boot time doesn’t appear to be as fast because Linpus cheated in many ways, it’s still pretty fast. Besides, after a complete boot into Slackware console, the memory usage is only about 16M; with X running it’s only around 140M, not counting cached memory. Beat that Linpus!
By the way please remember to add back your user to the system by using command adduser.
Splash Screen
Though bootsplash folks have moved onto non-kernel implementation called splashy, I still prefer the original bootsplash way. The Linpus kernel had it built-in, and to enable it we’ll need a custom initrd:
mkinitrd -c -k 2.6.29.3lw -f ext2 -r /dev/sda1 -h swap:/dev/sda2
splash -s -f <full path to your splash.cfg> > /boot/initrd-tree/bootsplash
mkinitrd
The splash command is obtained by compiling bootsplash-3.1.tar.bz2, and there are lots of themes available at kde-look.org.
After this, change kernel parameter line in /boot/extlinux.conf to look like this:
 kernel bzImage
 append vga=788 ro splash=silent initrd=/boot/initrd.gz
Here the vga=788 enables VESA resolution 800x600 (unfortunately native 1024x600 is not supported by the BIOS), and you MUST use a bootsplash theme with 800x600 images, otherwise no splash will be shown.
It should also be noted that using initrd breaks suspend-to-disk because tuxonice needs to be properly initialized. This can be done by changing /boot/initrd-tree/init, find the portion that deals with RESUMEDEV, and change it to the following:
  # Resume state from swap
  if [ "`RESUMEDEV" != "" ]; then
    echo "Trying to resume from `RESUMEDEV"
    echo `RESUMEDEV > /sys/power/tuxonice/resume
    echo > /sys/power/tuxonice/do_resume
  fi
After this do another mkinitrd, you’ll have suspend-to-disk back. To verify:
dmesg|grep -i TuxOnIceThe first line of output should read some thing like:
TuxOnIce: Normal swapspace found.Hardware Mods
I spent quite some time modding my AA1 with a touchscreen, and an internal CF card (since I fried the original SSD when I was doing the touchscreen mod, duh!). I mostly followed the mod guides on the aspire one forum.